The program provides the opportunity for the simultaneous control and display of data traffic of multiple serial ports, or for the implementation of macro automation.
Multi-window Serial Port Monitoring and Macro Automation
Online Manual (v1.0.4)
1. Program
2. Menu Functions
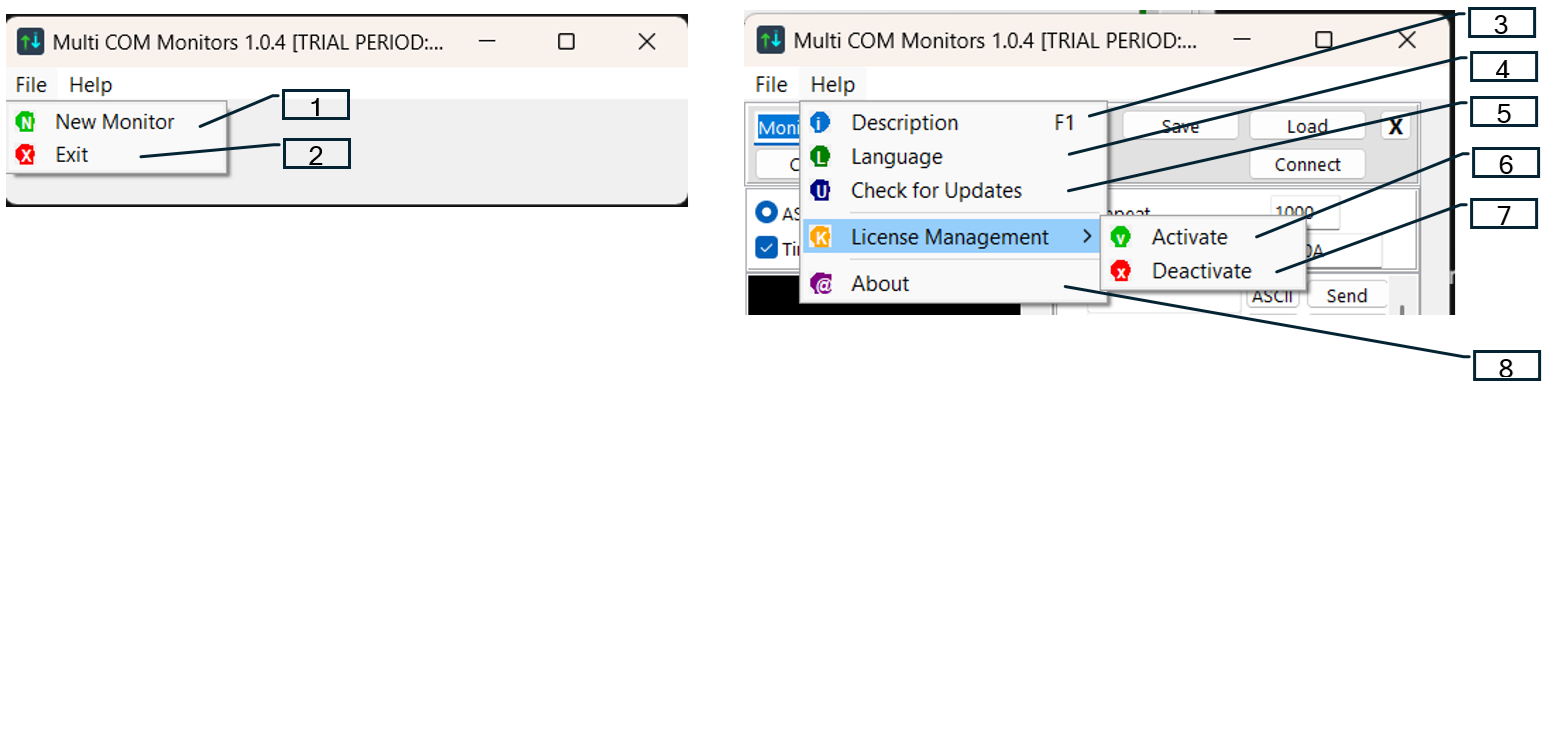
- New Monitor. Places a new monitor window on the screen. The position of the old monitor windows remains unchanged!
- Exit. Closing the program.
- Description. A brief description of the program.
- Language. Selection from 18 languages.
- Check for updates. Searching for a newer version.
- 1Activation. Activation of the purchased program with the received license key.
- 1Deactivation. Deactivation of the license on this machine. Afterward, the license can be transferred to another machine.
- About. Contact details of the developer.
3. New Monitor Screen
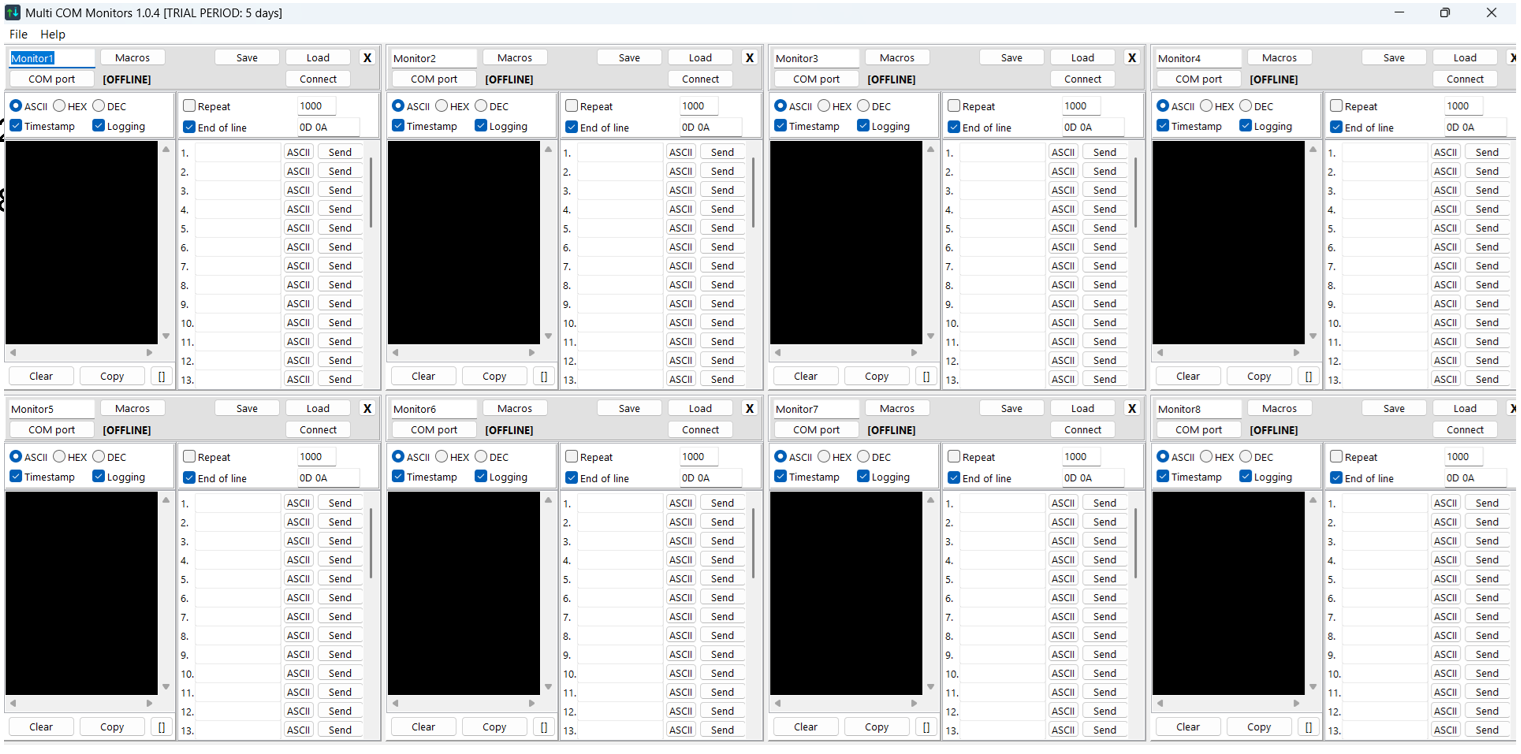
4 windows fit per row on the screen, and a total of 2 rows can be formed. The additional ports appear at the bottom and become visible by scrolling.
4. Monitor Operation
The received data (corresponding to the current settings: ASCII, HEX/DEC, Timestamp, Logging) appear in blue color in the reception window. A unique name can be assigned to every monitor window. The configuration data of the window can be saved and loaded. The reception window can be enlarged or reduced with the "[]" button, its content can be copied with the "Copy" button, and can be deleted with the "Delete" button.
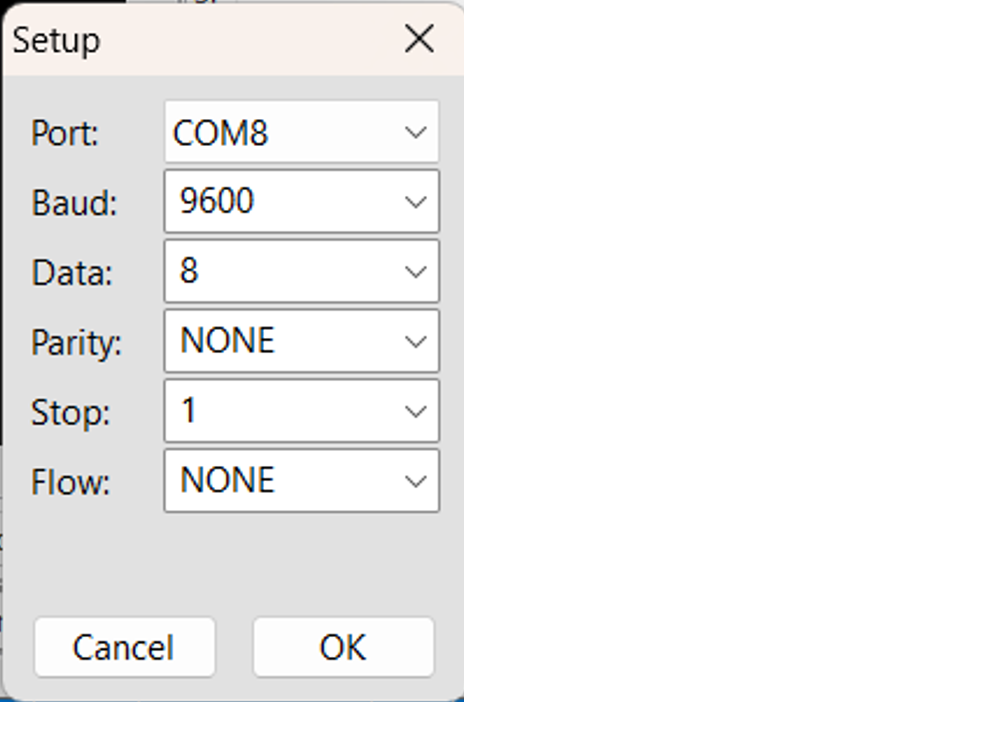
Setup:
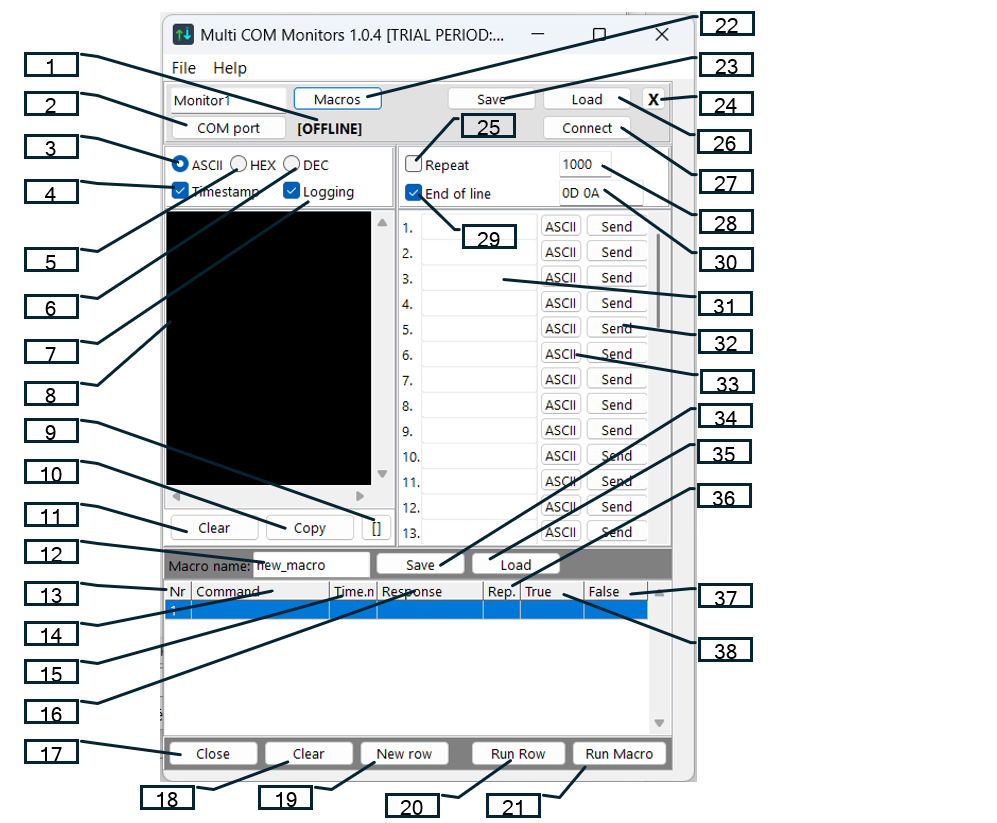
Legend (1-38):
- OFFLINE. Indication of COM port status.
- COM port. Opening a new serial monitor window.
- ASCII. Text reception, non-printable characters appear as hexadecimal bytes (#FA).
- Timestamp. Attaching a timestamp to the incoming data.
- HEX. The received data in hexadecimal format, separated by spaces.
- DEC. The received data in decimal format, separated by spaces.
- Logging. Saving all received and sent data into a log file.
- Window for displaying the sent and received data.
- [] Enlarging / reducing the reception window.
- Copy. Copying the content of the terminal to the clipboard.
- Clear. Clearing the display of the terminal.
- Name of the saved or loaded macro table.
- Row No. Number of the macro row.
- Command. Macro command to be sent.
- Time.ms. Waiting time for the response in milliseconds.
- Response. Expected response pattern for verification.
- Close. Closing the macro panel.
- Delete. Deleting all macro rows from the table.
- New row. Adding a new row to the table.
- Run row. Starting the entire macro process.
- Run macro. Immediate execution of the selected macro row.
- Macros. Opening / closing the macro table.
- Save. Saving settings to a file.
- X. Closing the monitor window.
- Repeat. Selecting the repeat function.
- Load. Loading settings from a file.
- Connect. Connecting / disconnecting the COM port.
- Repetition delay in milliseconds.
- End of Line. Adding end-of-line characters to the sent data.
- Line Terminators (EOL).
- Data to be sent.
- Send. Send button.
- ASCII/HEX/DEC selector. Format of sending data.
- ASCII
- HEX
- DEC
- Save. Saving the macro table.
- Load. Loading the macro table.
- Repeat. Number of repetitions if the expected response has not arrived.
- False. Jump here in case of error or timeout.
- True. Jump here in case of a successful response.
5. Macro Operation

6. License Management
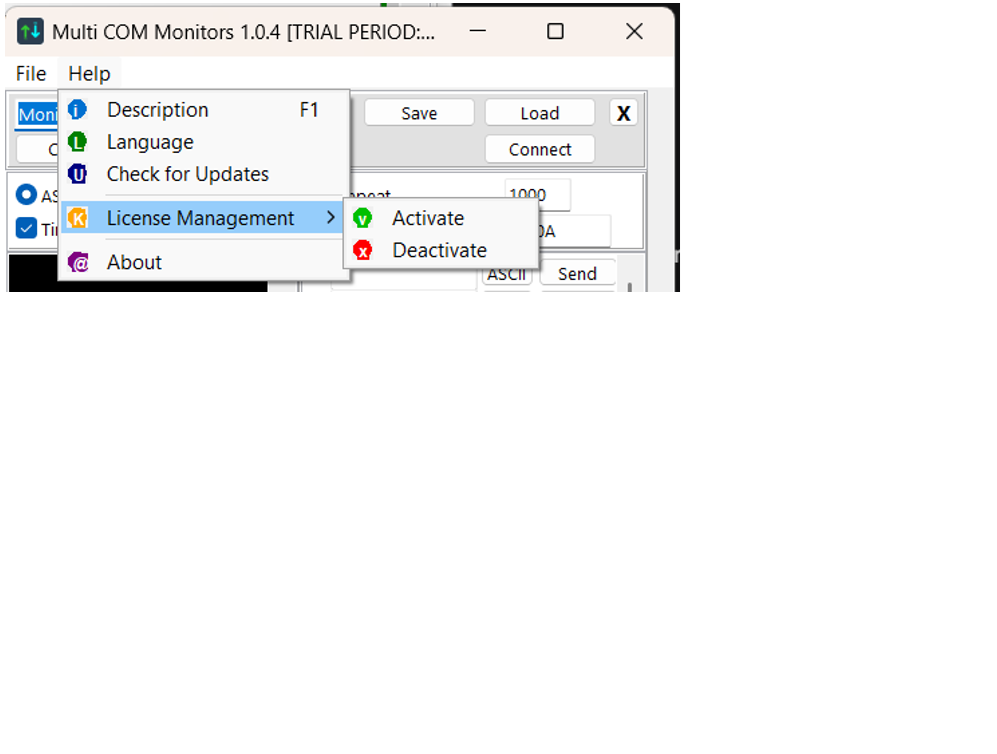
Activation:
To unlock the full functionality of the software, you have to activate your copy with the license key received at the time of purchase.
Usage:
- Select the Activation item,
- enter the unique license key into the input field,
- then click on the confirmation button.
Requirements: An active internet connection is required for the first activation for the verification of the key with our servers. Result: Following the activation, every professional function becomes available, and the data of the license appear in the management window.
Deactivation:
The Deactivation function is essential if you would like to transfer the license to another computer.
Usage:
Before the removal of the software or moving to a new PC, select the Deactivation item. This process releases the license from the current hardware, and returns it to the license pool.
Why it is necessary: Since every license key is bound to a defined number of simultaneous installations, the deactivation of the software on the old machine ensures that you can successfully activate it on a new machine.
© 2026 DevProt Engineering. Home